
There’s a common problem with baked chicken recipes that use sauce. The chicken cooks, but the sauce slides off, pools at the bottom, and never really becomes part of the dish. You end up with dry meat and a sauce that feels separate instead of integrated.
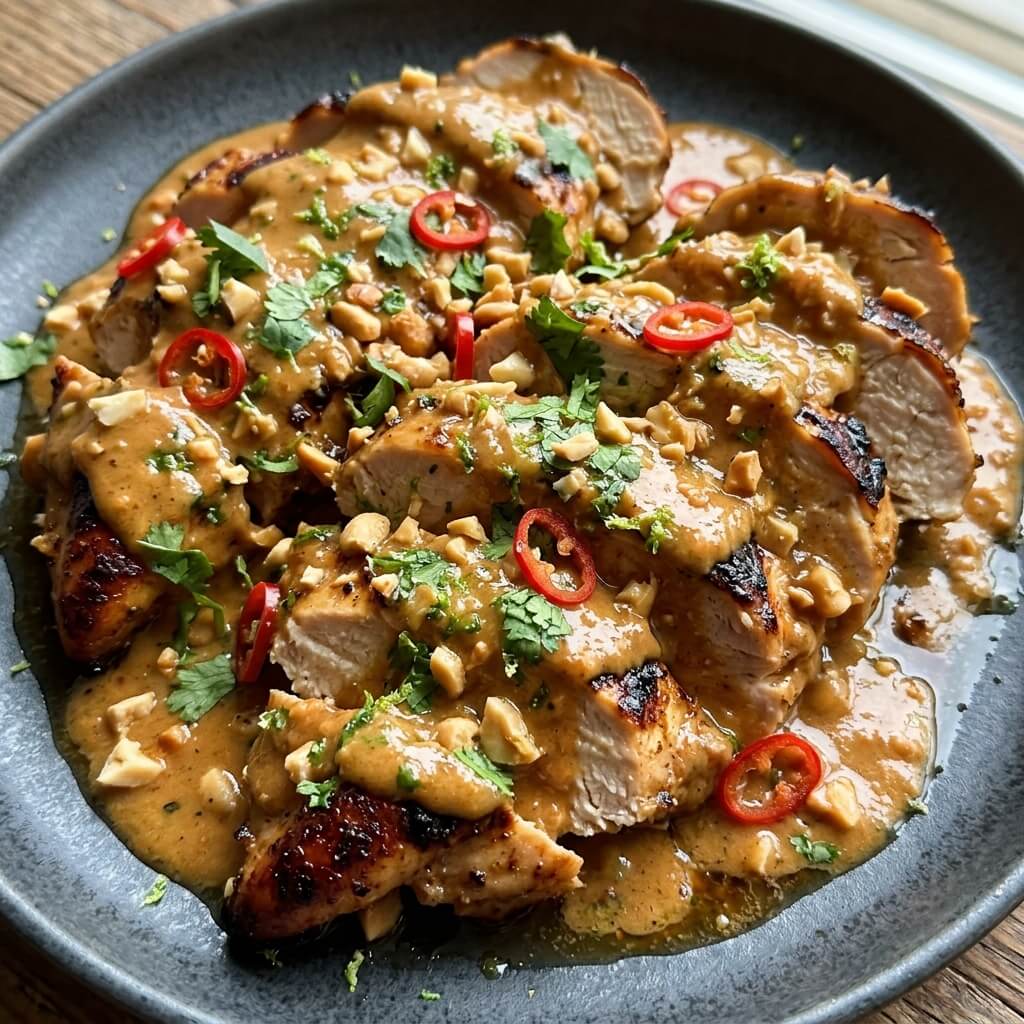
Baked Thai Peanut Chicken Breasts should not work like that. The sauce should cling, slightly thicken, and coat the chicken so every bite carries flavor instead of relying on what’s left in the pan.
This version focuses on that exact problem. Not just baking the chicken, but controlling how the peanut sauce behaves in the oven, how the chicken holds moisture, and how both come together instead of staying separate. Once you understand that, the result becomes consistent instead of unpredictable.
Why Most Baked Thai Peanut Chicken Breasts Fail in the Oven
The issue isn’t the ingredients. It’s the timing and technique.
Many recipes pour peanut sauce over raw chicken and bake everything together. The problem is that peanut sauce contains fats and sugars that react differently under heat. Instead of coating the chicken, it separates or burns lightly while the chicken cooks underneath.
Another issue is moisture. Chicken breasts cook quickly, and without protection, they dry out before the sauce has time to develop.
Baked Thai Peanut Chicken Breasts work when:
- The chicken is prepared to retain moisture
- The sauce is added at the right stage
- Heat is controlled instead of rushed
- The sauce is thick enough to cling but not too heavy
Fixing these points changes the outcome completely.
Ingredients That Actually Work Together
- 4 chicken breasts
- 1 tablespoon oil
- Salt and black pepper
- 1/2 teaspoon garlic powder
Peanut Sauce:
- 1/2 cup peanut butter
- 2 tablespoons soy sauce
- 1 tablespoon lime juice
- 1 tablespoon honey
- 1/2 teaspoon ginger
- 1/4 cup warm water (to adjust consistency)
The key here is balance. Peanut butter alone is too thick. Water and lime juice loosen it just enough so it spreads and bakes properly without separating.
Preparing the Chicken for Even Cooking
Start by patting the chicken dry. This step matters more than most people think. Moisture on the surface prevents proper baking and affects how the sauce attaches later.
Lightly season the chicken with salt, pepper, and garlic powder. Keep it simple. The peanut sauce will carry most of the flavor.
If the chicken breasts are thick, lightly flatten them to an even thickness. This ensures they cook at the same rate and prevents dry edges with undercooked centers.
Step-by-Step Method for Baked Thai Peanut Chicken Breasts
- Preheat your oven to 375°F
- Place the chicken breasts in a lightly greased baking dish
- Bake the chicken uncovered for 10–12 minutes (initial cooking phase)
- While the chicken bakes, prepare the peanut sauce by mixing all sauce ingredients until smooth
- Remove the chicken from the oven once it starts to firm up but is not fully cooked
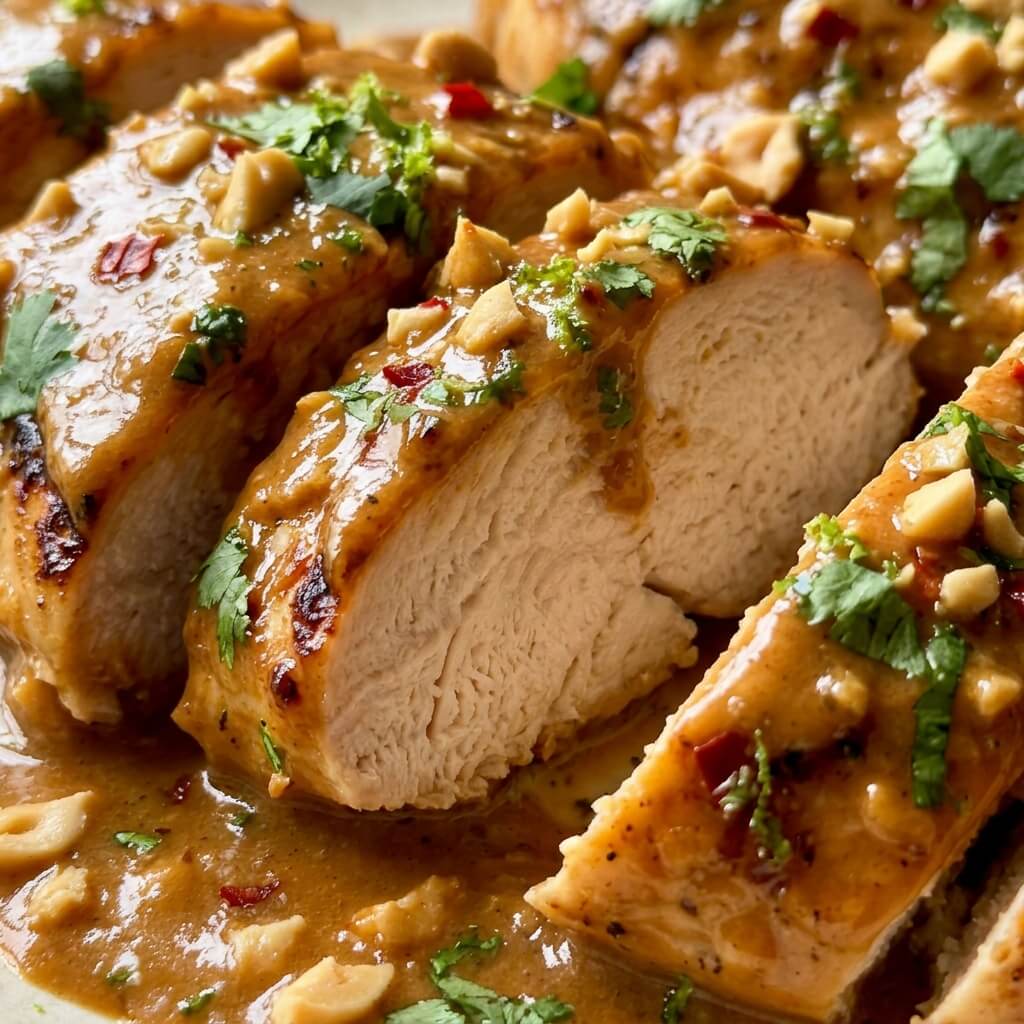
- Spoon and spread the peanut sauce evenly over each chicken breast
- Return the dish to the oven and bake for another 10–15 minutes
- Let the chicken rest for 5 minutes before serving
This two-step baking process is what changes everything. It allows the chicken to start cooking before the sauce is added, preventing the sauce from breaking down too early.
How the Peanut Sauce Should Look (Very Important)
When done correctly, the sauce should:
- Lightly thicken on top of the chicken
- Stay glossy, not oily
- Stick to the surface instead of sliding off
If the sauce looks dry or separated, it means:
- The heat was too high
- The sauce was too thick
- It was added too early
Adjusting these factors keeps the sauce stable.
Controlling Juiciness in Baked Thai Peanut Chicken Breasts
Chicken breasts lose moisture quickly in the oven. To prevent that:
- Do not overbake in the first stage
- Always use the second stage for finishing
- Let the chicken rest before slicing
This method keeps Baked Thai Peanut Chicken Breasts tender instead of dry.
If you’re looking for a lighter side, Healthy Greek Yogurt Avocado Chicken Salad balances the richness of the peanut sauce without competing with its flavor.
Flavor Balance Without Overloading the Sauce
A good peanut sauce isn’t supposed to taste like peanut butter alone. The richest versions are layered, with sweetness, acidity, saltiness, and nuttiness working together instead of competing.
When tasting the finished sauce, ask yourself one simple question:
Does one flavor stand out more than the others?
If the answer is yes, adjust only one ingredient at a time.
- Too thick? A splash of warm water will loosen the sauce without weakening its flavor.
- Too sweet? Fresh lime juice adds brightness and keeps the sauce from feeling heavy.
- Not savory enough? A little soy sauce deepens the flavor without making it salty.
Small adjustments are usually more effective than large ones. Once the sauce coats the chicken evenly and every flavor feels balanced, it’s ready to serve.
Serving Baked Thai Peanut Chicken Breasts Without Competing Flavors
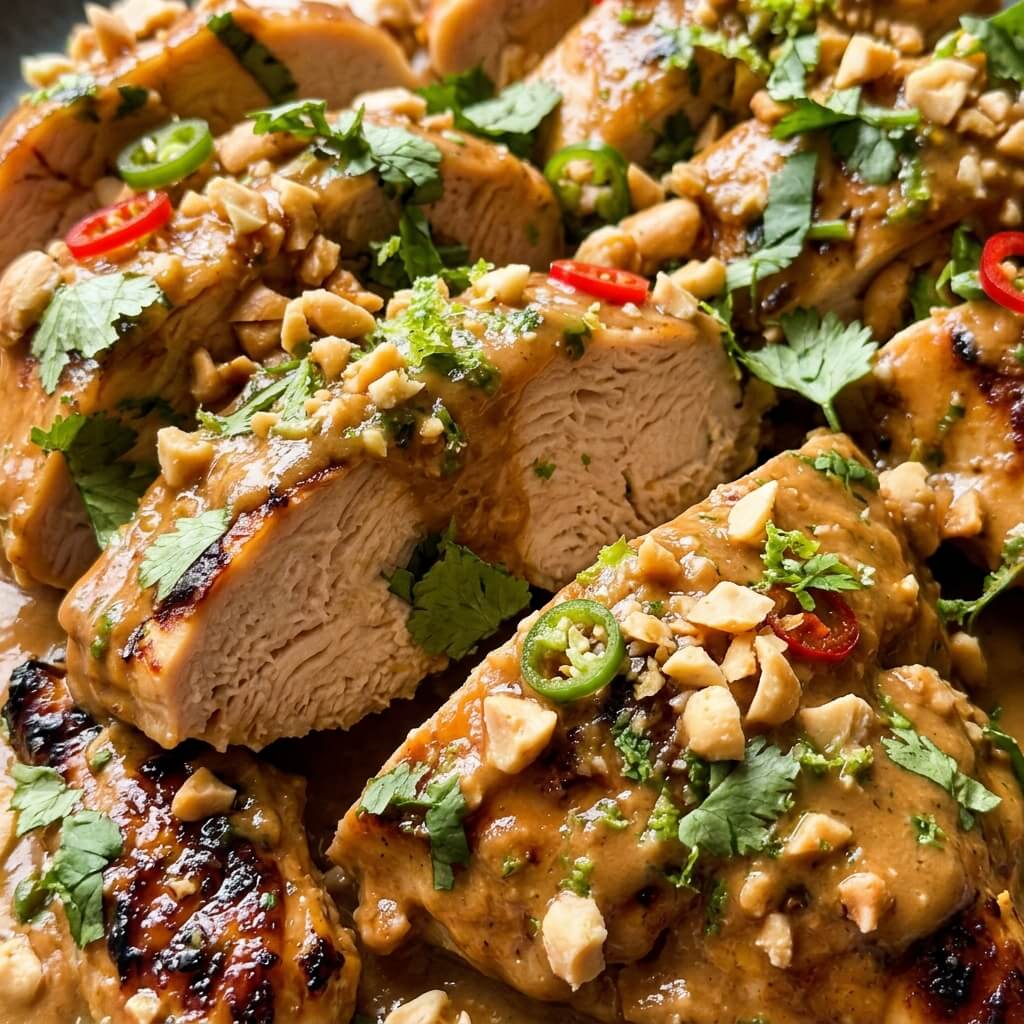
The peanut sauce already provides plenty of richness, so the goal is to build a plate that feels balanced rather than heavy.
Great Pairings
- Steamed jasmine rice to soak up every bit of the sauce.
- Broccoli, snap peas, or green beans for freshness and crunch.
- Fresh cilantro, sliced green onions, or lime wedges for a bright finishing touch.
- A crisp Healthy Greek Yogurt Avocado Chicken Salad when you want a lighter contrast alongside the chicken.
Better to Skip
Instead of creamy casseroles, buttery potatoes, or rich pasta dishes, stick with simple sides that let the peanut sauce remain the highlight of the meal. The cleaner the flavors on the plate, the more the sweet, savory, and nutty notes of the chicken stand out.
Storage and Reheating Without Ruining the Sauce
Leftovers taste just as satisfying the next day when they’re stored correctly. Keep the chicken and the remaining peanut sauce together in an airtight container so the meat stays coated as it chills. For the best flavor and texture, enjoy it within 3 days.
Before You Reheat
| Do This | Why It Matters |
|---|---|
| Add 1–2 tablespoons of water or chicken broth | Loosens the sauce as it warms. |
| Reheat over low to medium heat | Keeps the peanut sauce smooth instead of oily. |
| Spoon the sauce over the chicken while warming | Helps every piece stay evenly coated. |
Peanut sauce naturally thickens after refrigeration, so don’t worry if it looks firmer than it did when freshly baked. A little added moisture and gentle heat will bring it back to a creamy consistency.
One thing to avoid: High heat. It can cause the peanut butter to separate, leaving the sauce grainy while the chicken becomes dry around the edges.
Pro Tips for Best Results
- Bake chicken first before adding sauce: This prevents the peanut sauce from breaking down too early in the oven and helps it stick properly
- Adjust sauce consistency before using: It should be smooth and spreadable, not thick like paste or too thin like liquid
- Use even chicken thickness: This ensures all pieces cook at the same rate and stay juicy
- Let the chicken rest after baking: This keeps juices inside instead of drying out immediately
Common Mistakes to Avoid
- Adding sauce too early: Causes separation and uneven coating
- Using thick peanut butter without adjusting: Prevents proper spreading and baking
- Overbaking the chicken: Leads to dryness even if the sauce looks good
- Skipping resting time: Reduces moisture and affects texture
Why This Version of Baked Thai Peanut Chicken Breasts Works
This method focuses on timing and control. Instead of combining everything at once, it builds the dish in stages so each element behaves correctly.
Baked Thai Peanut Chicken Breasts turn out better when the sauce is treated separately from the chicken until the right moment. That’s what keeps the texture balanced and the flavor consistent.
Once you apply this approach, the result becomes reliable. You don’t need to adjust every time or guess what went wrong.
FAQs
How do I keep Baked Thai Peanut Chicken Breasts from drying out?
Use the two-step baking method and avoid overcooking during the first phase. Letting the chicken rest also helps retain moisture.
Can I marinate the chicken in peanut sauce?
It’s not recommended for baking because the sauce can separate under heat. It works better when added during cooking.
What consistency should the peanut sauce be?
It should be smooth and slightly thick but still spreadable, not too heavy or too runny.
Can I use crunchy peanut butter?
Yes, but it will change the texture slightly and make the sauce less smooth.
Can I make this recipe ahead of time?
Yes, but reheat gently with added moisture to keep the sauce from thickening too much.
Print
Baked Thai Peanut Chicken Breasts
- Total Time: 40 min
- Yield: 4 servings 1x
Description
Juicy baked chicken breasts coated in a creamy homemade Thai peanut sauce with garlic, ginger, soy sauce, and fresh lime. This easy dinner comes together with simple pantry ingredients and delivers bold flavor in every bite.
Ingredients
4 boneless skinless chicken breasts
1 teaspoon kosher salt
1/2 teaspoon black pepper
1 tablespoon olive oil
1/2 cup creamy peanut butter
2 tablespoons low-sodium soy sauce
2 tablespoons fresh lime juice
1 tablespoon honey
2 cloves garlic, minced
1 teaspoon grated fresh ginger
1/4 teaspoon crushed red pepper flakes (optional)
1/4 cup warm water
2 tablespoons chopped fresh cilantro
1 tablespoon chopped roasted peanuts for garnish
Lime wedges for serving
Instructions
1. Preheat the oven to 375°F and lightly grease a baking dish with olive oil.
2. Pat the chicken breasts dry, season both sides with salt and pepper, and arrange them in the prepared baking dish.
3. Bake the chicken for 10 to 12 minutes while preparing the peanut sauce.
4. Whisk together the peanut butter, soy sauce, lime juice, honey, garlic, ginger, warm water, and red pepper flakes until completely smooth.
5. Remove the chicken from the oven and spread the peanut sauce evenly over each chicken breast.
6. Return the dish to the oven and continue baking for 10 to 15 minutes, or until the chicken reaches an internal temperature of 165°F.
7. Let the chicken rest for 5 minutes before serving so the juices redistribute.
8. Garnish with chopped cilantro, roasted peanuts, and fresh lime wedges before serving.
Notes
Use chicken breasts of similar thickness so they cook evenly.
If the peanut sauce seems too thick, whisk in a little more warm water before spreading it over the chicken.
Avoid baking the chicken longer than necessary, as chicken breasts dry out quickly.
Store leftovers in an airtight container in the refrigerator for up to 3 days.
Reheat gently with a splash of water or chicken broth to restore the creamy consistency of the sauce.
- Prep Time: 15 min
- Cook Time: 25 min
- Category: Dinner
- Method: Baked
- Cuisine: Thai-Inspired
Nutrition
- Serving Size: 1 chicken breast
- Calories: 486 kcal
- Sugar: 8 g
- Sodium: 690 mg
- Fat: 28 g
- Saturated Fat: 6 g
- Unsaturated Fat: 20 g
- Trans Fat: 0 g
- Carbohydrates: 12 g
- Fiber: 3 g
- Protein: 46 g
- Cholesterol: 146 mg
Keywords: Baked Thai Peanut Chicken Breasts, baked chicken recipe, Thai peanut chicken, peanut butter chicken, easy chicken dinner